Computers and IT
Links in Page: Starlink
Starlink is Here
We got the 2nd version of Starlink with the rectangular dish; WiFI only, no Ethernet port. Yes, you can buy a port for $20 and disable the router, but...
- We are on a remote ranch far from support, and
- I want to keep Starlink generic for future upgrades.
So How to Connect IP Cameras?
The cameras at the ranch are connected and powered over Ethernet (POE) and without an Ethernet port, we can’t talk to Starlink.
However, if we wire the cameras to a “Client Bridge”, the bridge can talk to Starlink via WiFi and now it all works.
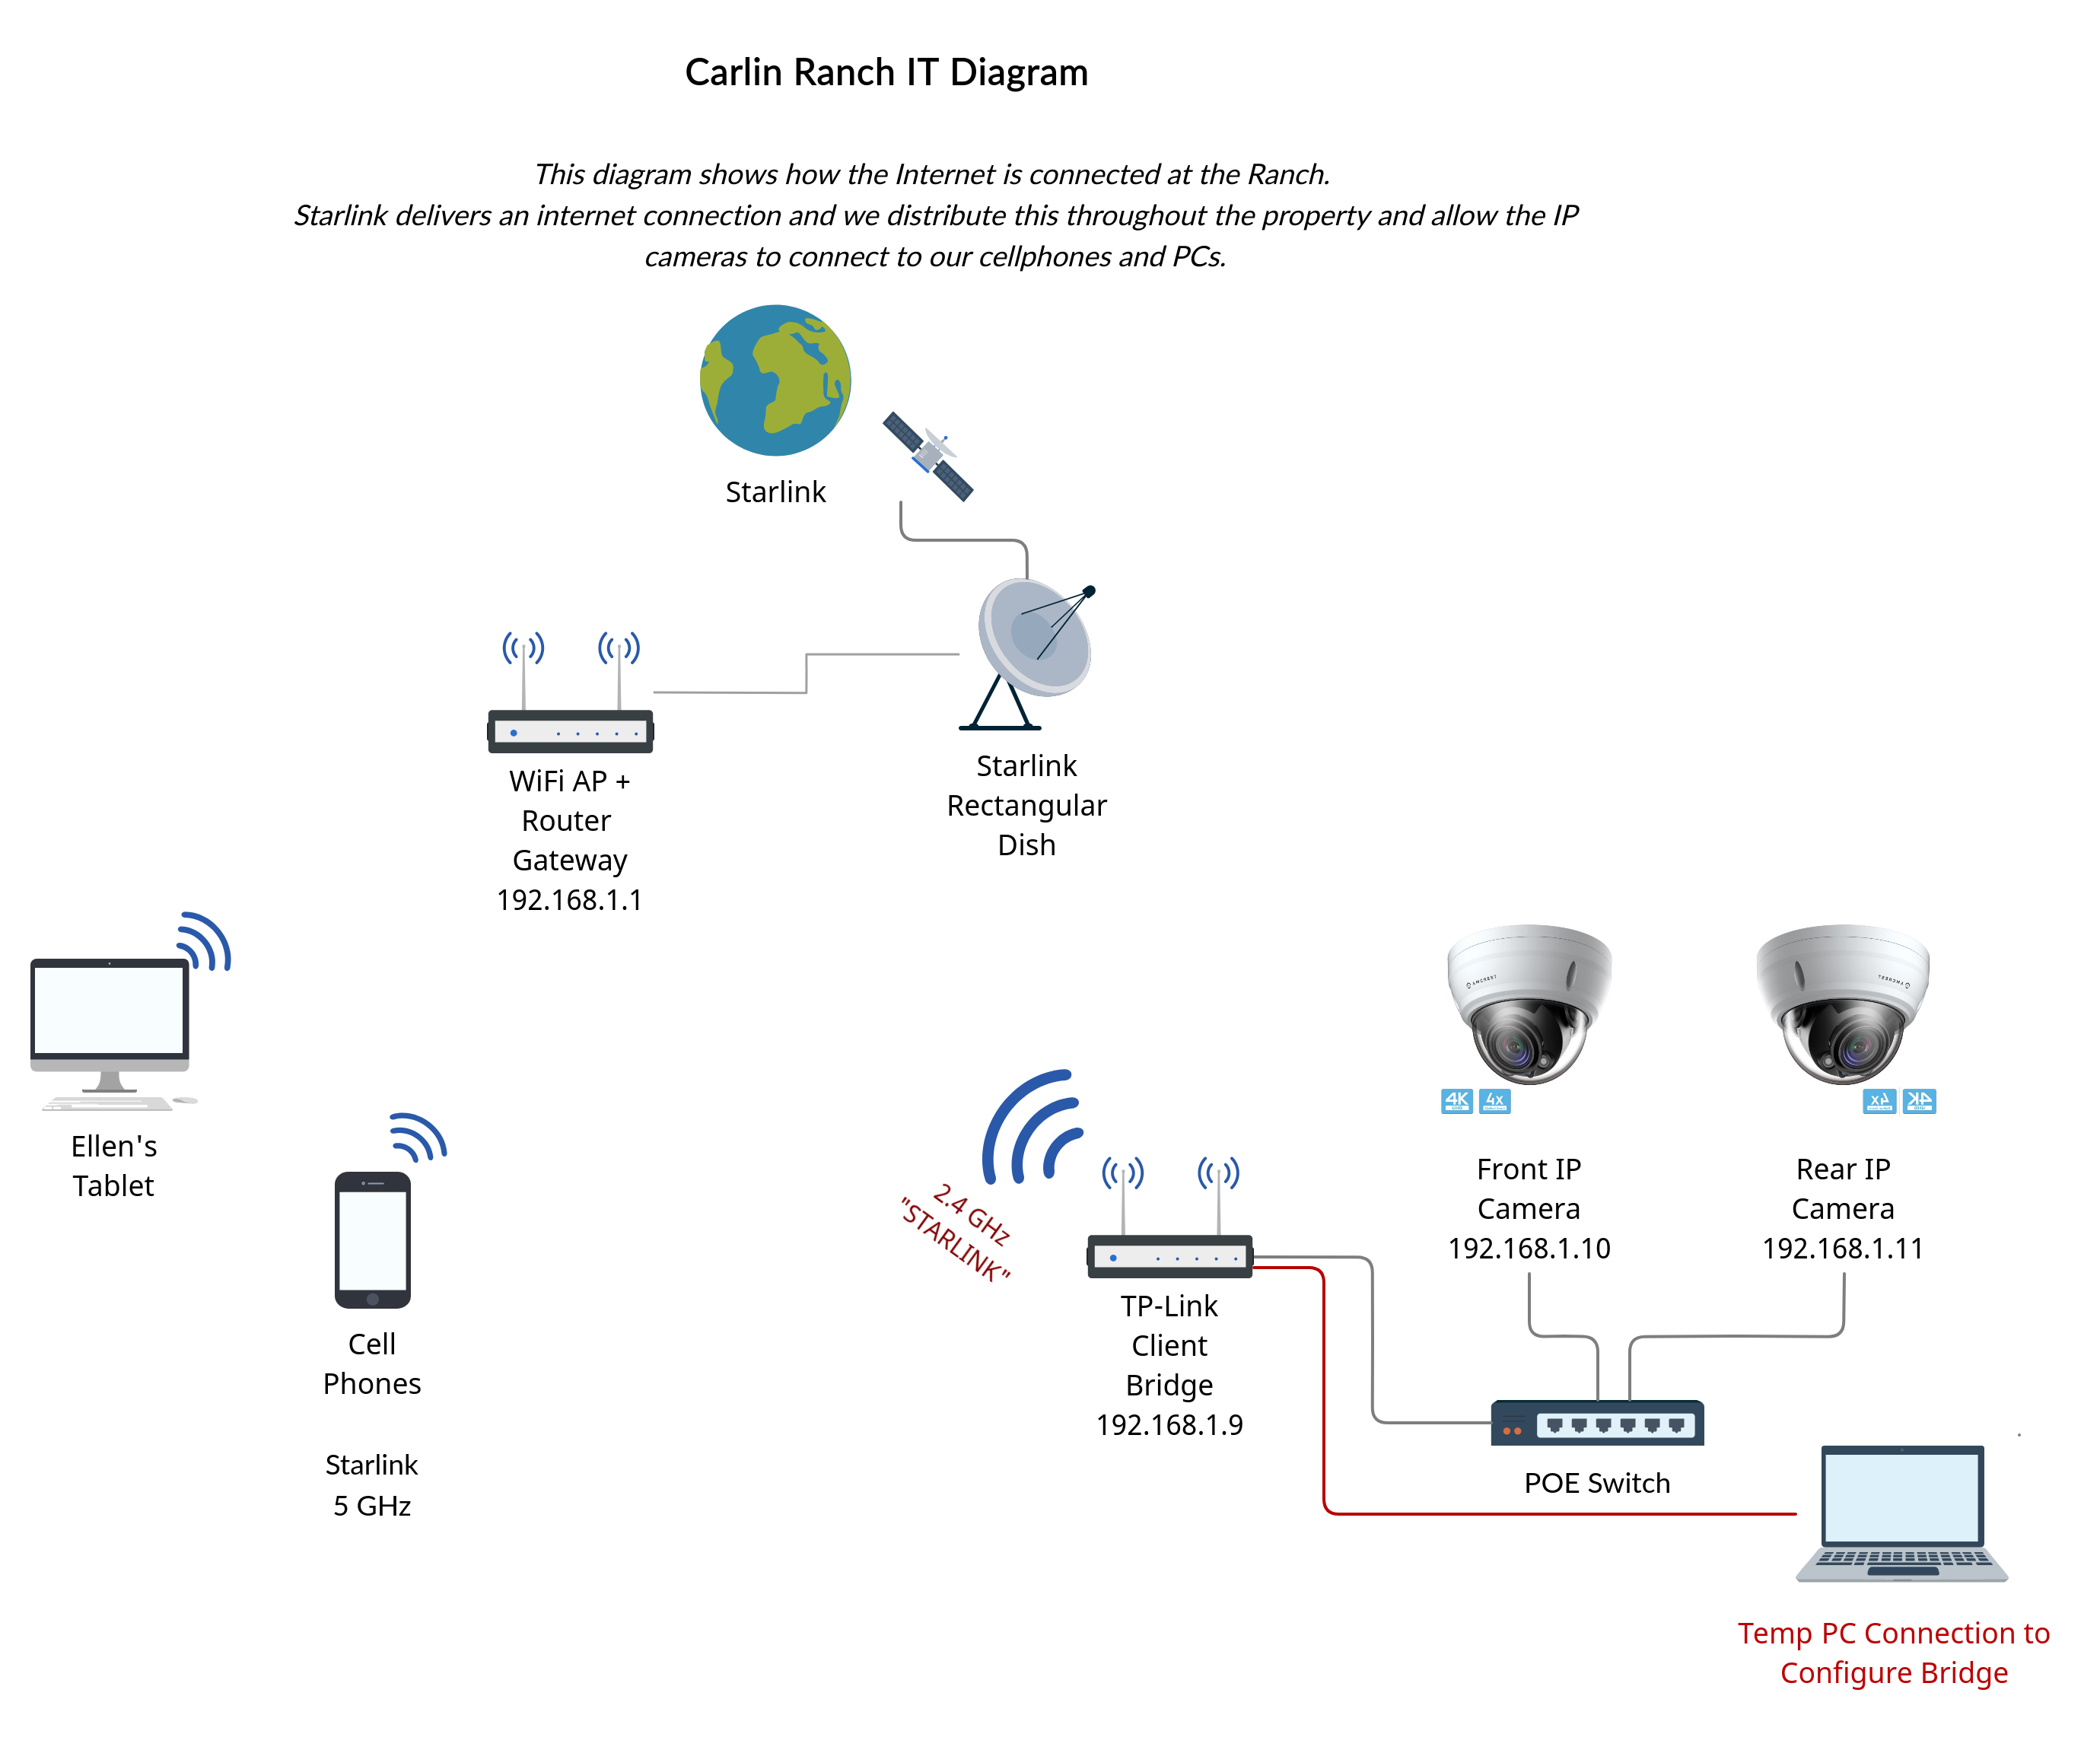
Creating a Client Bridge
In the diagram above, you can see how the cameras form a Group that connects to Starlink via WiFi. The “Wireless Bridge” replaces the Ethernet “Wire”.
You can buy a dedicated Client Bridge or just make one using a router if the router’s firmware supports it. In this case, I had an old TP-Link WR841N router that supported this feature natively. Here’s how to configure it.
- Configure Starlink to transmit in both 2.4 and 5.0 GHz. This is because the TP-Link doesn’t have the higher frequency. Omit this is you have a better router :-). You can also assign an SSID for each band or accept the defaults.
- Get LAN address of Starlink. Assuming you are connected via WiFi, there are several ways to get this: from a command prompt use ipconfig (in Windows) or ifconfig (in Linux). Mine was 192.168.1.1
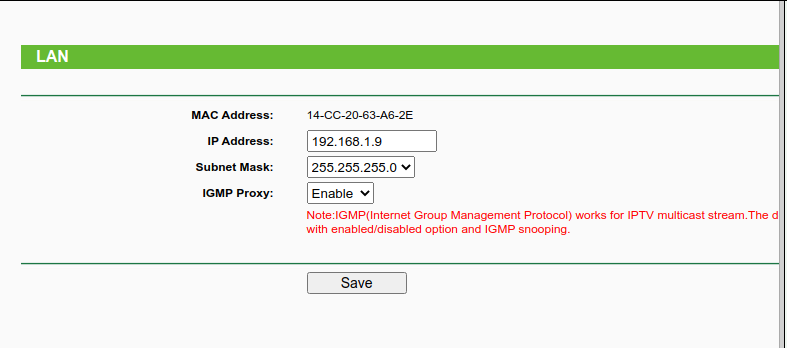
- Set LAN Address of Bridge: Connect to TP-Link via Ethernet, default address is 192.168.0.1 with default login admin, pw is admin (use another PC or turn off WiFi). Then change the IP to something in the same subnet as Starlink; I used 192.168.1.9. Save this page and re-log in with new address.
- Set New Login and Password for Bridge
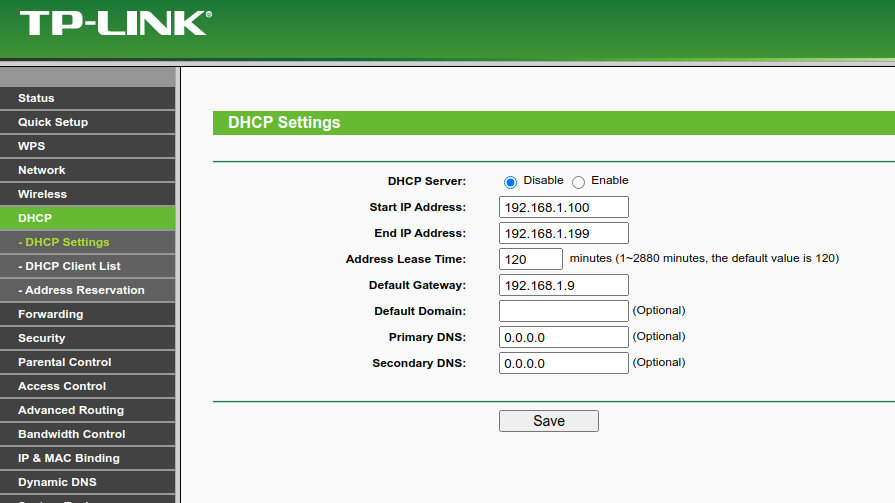
- Turn OFF DHCP. (Disable server)
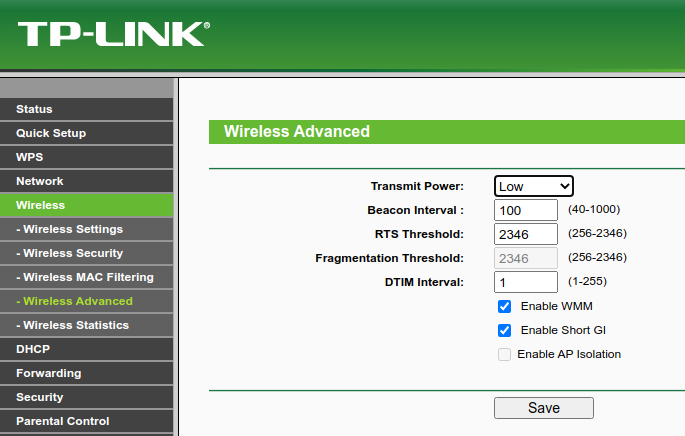
- I also set the transmit power to LOW as the Bridge will be physically near the Starlink. You have to decide for your situation. (if you have this option)
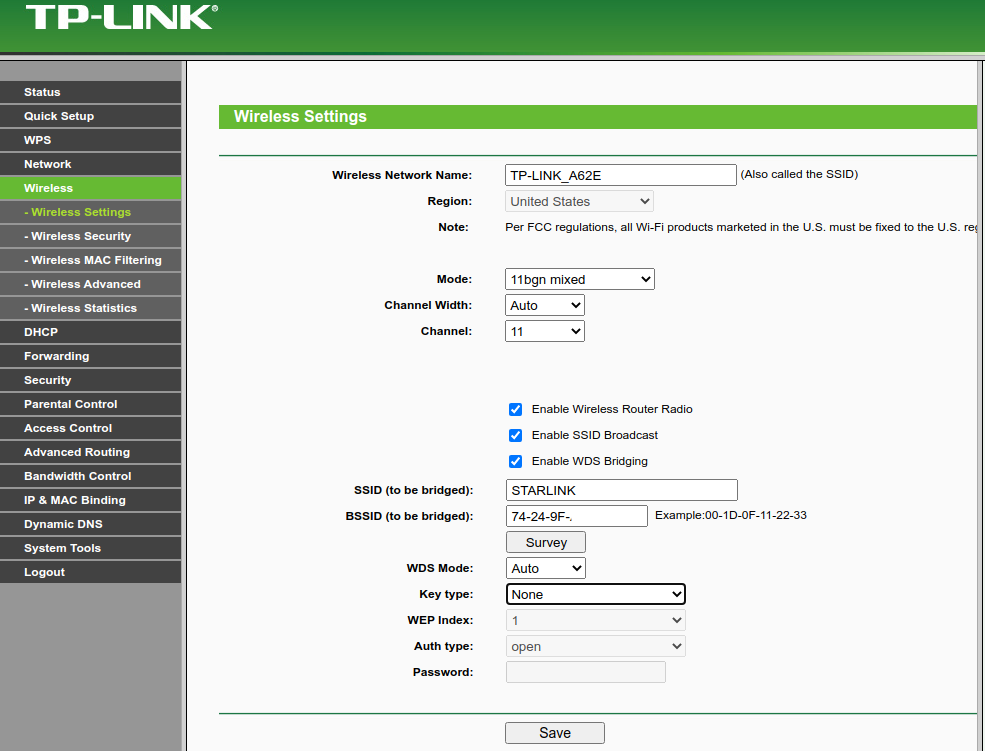
- Finally the WDS Bridging
- a) Start in the middle of the page and ENABLE WDS Bridging
- b) Try using the [ Survey ] button to scan for Starlink. If all works OK, clicking on the connect link in the list will auto-enter the BSSID. If NOT, then from a command window, enter arp -a (linux & Windows). On (192.168.1.1) I got 74-24-9f-00-00-00 (I changed my last digits to zero, you enter exactly what your address is)
- c) Now you need the radio channel. In Windows and Linux, the WiFI connection will give you this. Mine was 11. Select the proper channel
- d) Make sure the SSID is the one you are using for the proper band. I used the default “STARLINK”
- e) Lastly, select the encryption type of your password and enter your actual password to connect to Starlink. (In this example, no password was used)
- f) Hit SAVE and you are done. The TP-Link will run as a bridge, making a wireless connection to Starlink. Anything plugged into the LAN ports of the Router will appear on your network.If you go to STATUS, you will see “run” next to WDS, indicating that it has connected successfully.